Basic Environment Configuration
1. Check nvcc
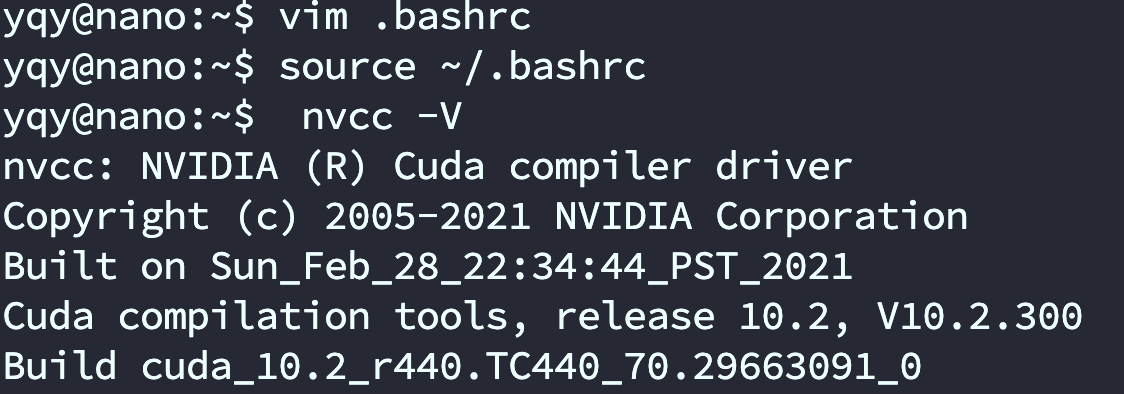
The Jetson Nano comes with CUDA preinstalled, but you must export the required environment variables (i.e., add the relevant paths) before you can use it. Only after the environment variables are correctly loaded can you run nvcc -V in the terminal.
sudo vim ~/.bashrc
Add the following lines at the end:
# Choose one set (either one is fine)

export CUDA_HOME=$CUDA_HOME:/usr/local/cuda
export LD_LIBRARY_PATH=/usr/local/cuda/lib64:$LD_LIBRARY_PATH
export PATH=/usr/local/cuda/bin:$PATH


export PATH=/usr/local/cuda-10.2/bin${PATH:+:${PATH}}
export LD_LIBRARY_PATH=/usr/local/cuda-10.2/lib64\
${LD_LIBRARY_PATH:+:${LD_LIBRARY_PATH}}
# After saving and exiting, run the following to apply the changes:
source ~/.bashrc
Run nvcc -V in the terminal. If it outputs normally, your CUDA path configuration is successful.
2. Install Torch and Vision (optional)
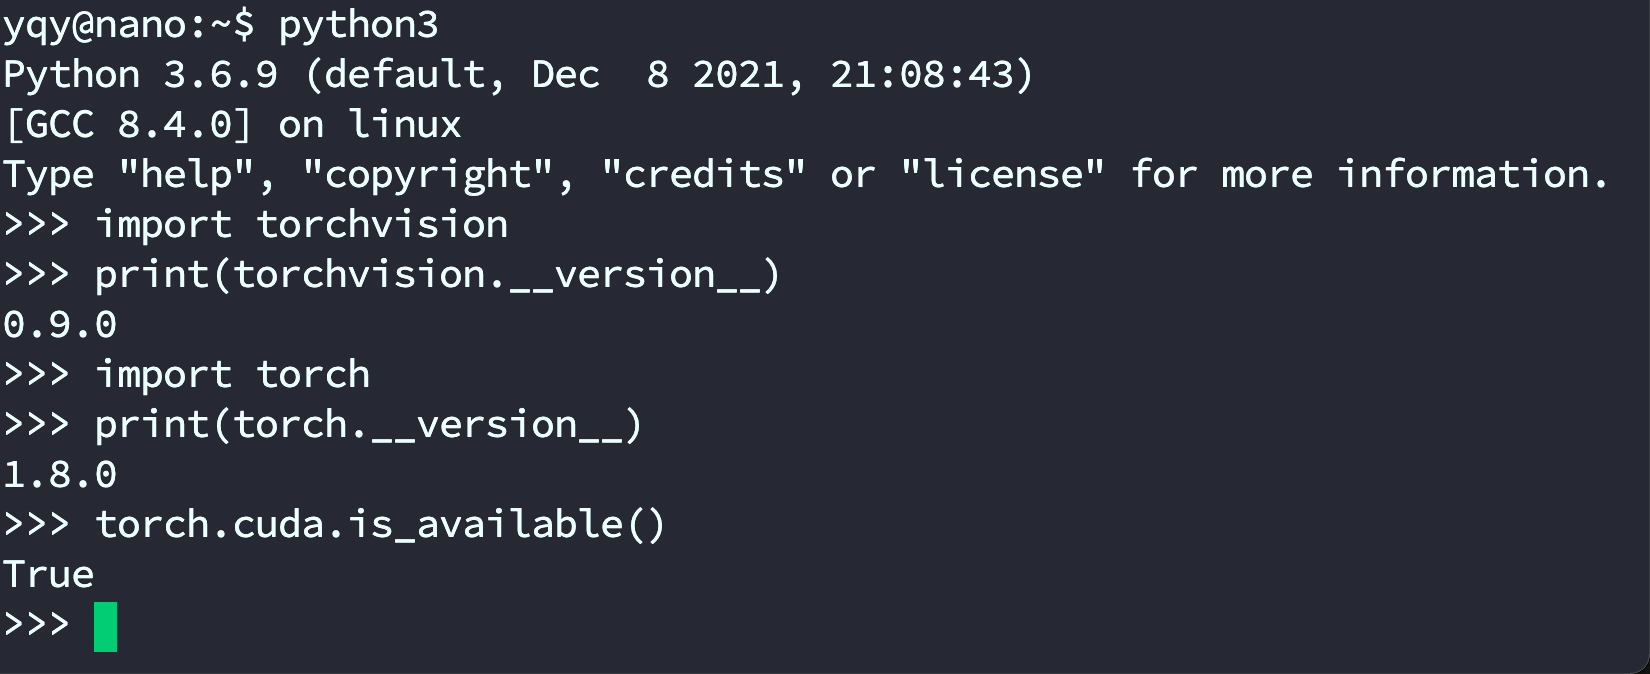
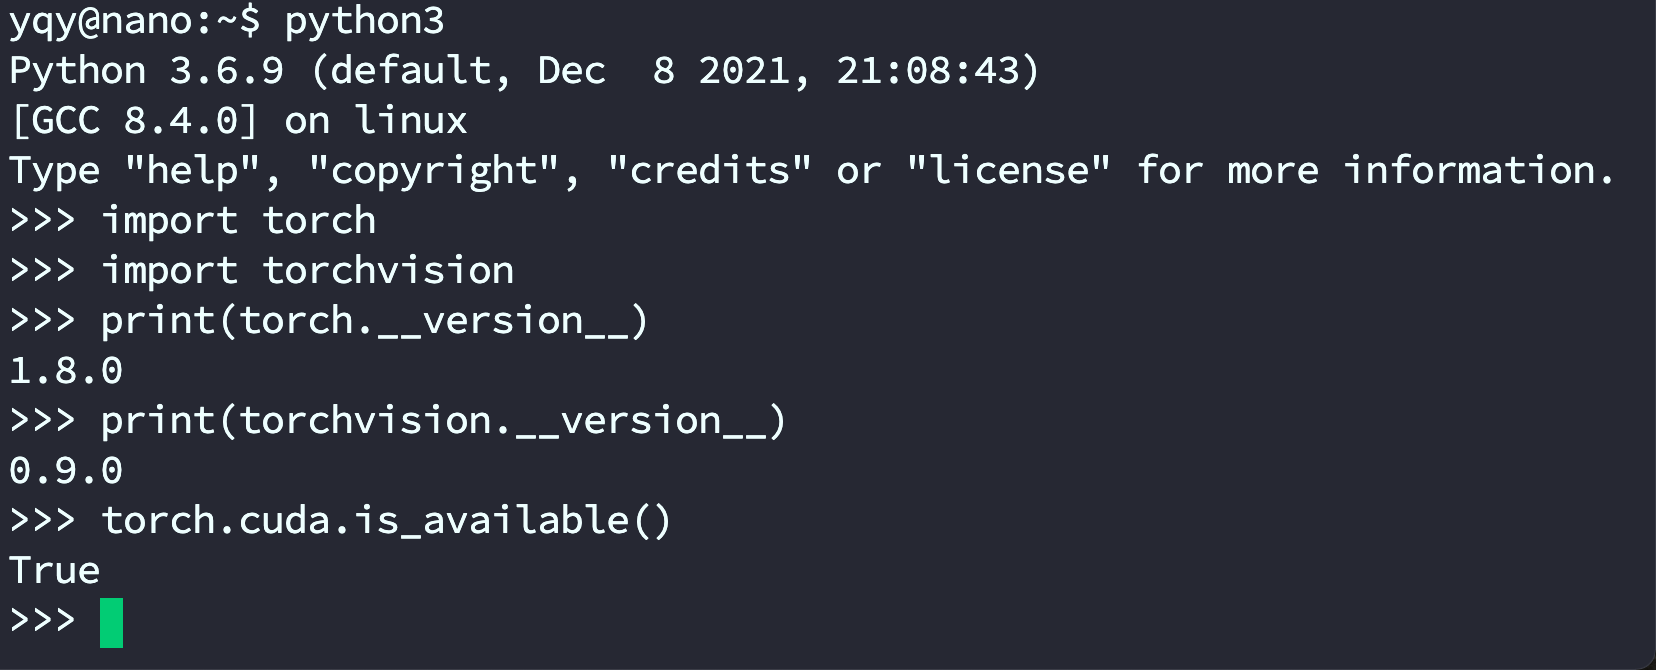
After installation, test results should look like the screenshot:
When installing PyTorch, make sure you have completed the CUDA step above (so nvcc -V works).
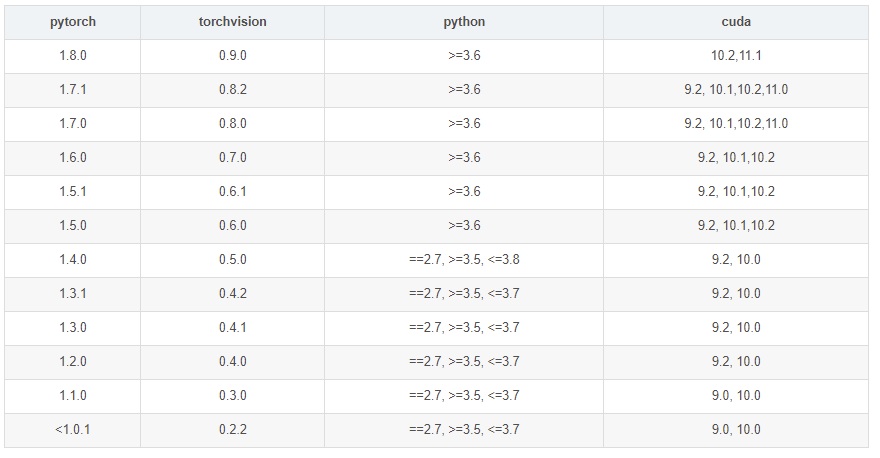
PyTorch and CUDA versions must match.
I found a 1.6.0 wheel online, uploaded it to the Jetson via WinSCP, then installed it offline. (The wheel can be found in “Materials 5 → Common libraries and models”.)
sudo pip3 install torch-1.6.0a0+b31f58d-cp36-cp36m-linux_aarch64.whl
sudo pip3 install torchvision
sudo pip install boto3
Enter the Python 3 REPL (run python3) and test import torch. I encountered:
ImportError: libopenblas.so.0: cannot open shared object file: No such file or directory
I followed this tutorial: https://www.cnpython.com/qa/77454
Installing the system OpenBLAS library fixed the issue:
sudo apt-get install libopenblas-dev
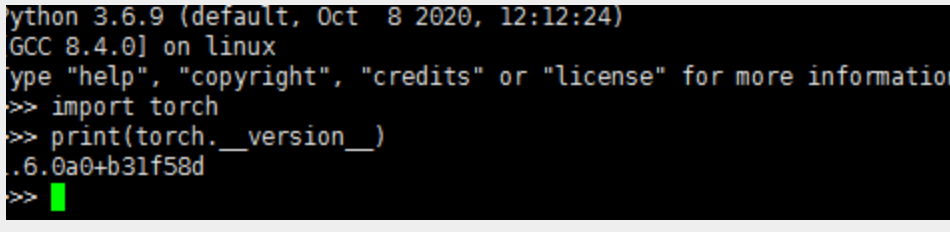
In the Python environment:
import torch
print(torch.__version__)
This prints the installed version:
Next, test basic PyTorch functionality in the Python 3 environment:
from __future__ import print_function

import torch

x = torch.rand(5, 3)
print(x)
Output:
tensor([[0.3380, 0.3845, 0.3217],
        [0.8337, 0.9050, 0.2650],
        [0.2979, 0.7141, 0.9069],
        [0.1449, 0.1132, 0.1375],
        [0.4675, 0.3947, 0.1426]])
Also check whether your GPU driver and CUDA are enabled and accessible via PyTorch:
import torch

torch.cuda.is_available()
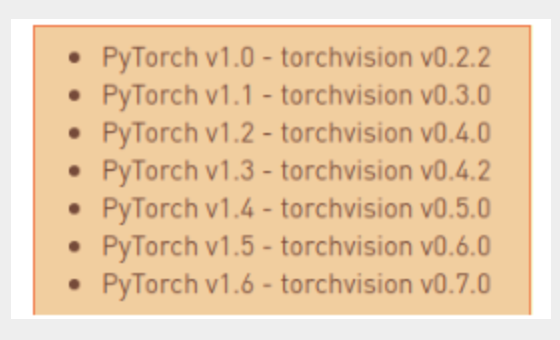
After testing, install torchvision. According to the official info, the matching torchvision version for PyTorch 1.6 is 0.7.0.
sudo apt-get install libjpeg-dev zlib1g-dev
git clone --branch v0.7.0 https://github.com/pytorch/vision torchvision
cd torchvision
export BUILD_VERSION=0.7.0
sudo python3 setup.py install
Note: the install may be missing some files. You can install the corresponding packages to resolve it. For example, I was missing three files and installed these three packages:

sudo apt install libavcodec-dev
sudo apt install libavformat-dev
sudo apt install libswscale-dev
Then run the install again:
sudo python3 setup.py install
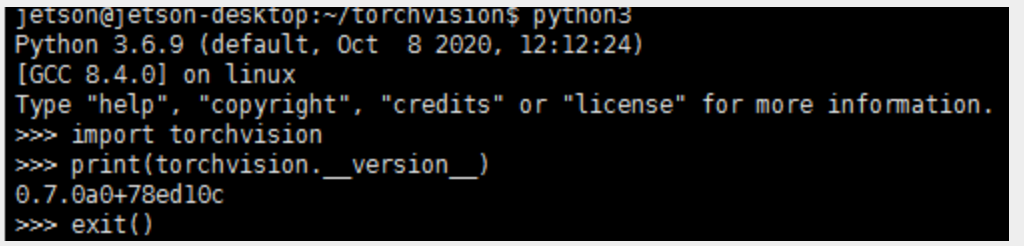
In Python, check the version match:
import torchvision
print(torchvision.__version__)
Other Jetson Nano Configuration
1. Update package mirrors
1.1. apt
sudo cp /etc/apt/sources.list /etc/apt/sources.list.bak
sudo vim /etc/apt/sources.list.bak
ggVG  select all
dG    delete to end of file
- Mirror sources:
deb http://mirrors.tuna.tsinghua.edu.cn/ubuntu-ports/ bionic main multiverse restricted universe
deb http://mirrors.tuna.tsinghua.edu.cn/ubuntu-ports/ bionic-security main multiverse restricted universe
deb http://mirrors.tuna.tsinghua.edu.cn/ubuntu-ports/ bionic-updates main multiverse restricted universe
deb http://mirrors.tuna.tsinghua.edu.cn/ubuntu-ports/ bionic-backports main multiverse restricted universe
deb-src http://mirrors.tuna.tsinghua.edu.cn/ubuntu-ports/ bionic main multiverse restricted universe
deb-src http://mirrors.tuna.tsinghua.edu.cn/ubuntu-ports/ bionic-security main multiverse restricted universe
deb-src http://mirrors.tuna.tsinghua.edu.cn/ubuntu-ports/ bionic-updates main multiverse restricted universe
deb-src http://mirrors.tuna.tsinghua.edu.cn/ubuntu-ports/ bionic-backports main multiverse restricted universe
sudo apt-get update # update
1.2. pip
sudo apt-get install python3-pip python3-dev
sudo apt-get install python-pip python-dev
- Switch pip to a mirror
sudo mkdir .pip        # create a hidden folder
ls -a                  # show all files (including hidden)
cd .pip                # enter the folder
sudo touch pip.conf
sudo vim pip.conf
- Mirror config:
[global]
timeout = 6000
index-url = http://pypi.doubanio.com/simple/
trusted-host = pypi.doubanio.com
1.3. Docker
cat /etc/issue # check the Ubuntu version
Check the Ubuntu version number.
Based on the Ubuntu version, configure the corresponding mirror sources. Go to the directory containing the sources file:
cd /etc/apt/
Open sources.list with an editor:
sudo gedit /etc/apt/sources.list
Replace the entire contents of sources.list with the following:
deb https://mirrors.ustc.edu.cn/ubuntu-ports/ bionic main restricted universe multiverse
deb https://mirrors.ustc.edu.cn/ubuntu-ports/ bionic-updates main restricted universe multiverse
deb https://mirrors.ustc.edu.cn/ubuntu-ports/ bionic-backports main restricted universe multiverse
deb https://mirrors.ustc.edu.cn/ubuntu-ports/ bionic-security main restricted universe multiverse
After updating the sources file, save and exit:
sudo apt-get update
2. Install PyTorch and torchvision
- Official guide
- Versions must match.

- Download the official wheel: torch-1.8.0-cp36-cp36m-linux_aarch64.whl
- Follow the official steps:
sudo apt-get install python3-pip libopenblas-base libopenmpi-dev pip3 install Cython pip3 install numpy torch-1.8.0-cp36-cp36m-linux_aarch64.whl # adjust the path to your downloaded wheel (this may be slow) sudo apt-get install libjpeg-dev zlib1g-dev libpython3-dev libavcodec-dev libavformat-dev libswscale-dev git clone --branch v0.9.0 https://github.com/pytorch/vision torchvision cd torchvision export BUILD_VERSION=0.9.0 python3 setup.py install --user # takes a long time- Check the environment:
python3
import torch
import torchvision
print(torch.__version__)
print(torchvision.__version__)
torch.cuda.is_available()
3. Miniforge package management (optional)
‼️ Important: This is an optional configuration. Because Jetson uses an ARM architecture, you cannot directly install Anaconda. If you need an Anaconda-like environment on Jetson, continue; otherwise, skip this section.
3.1. Miniforge overview
Conda is an open-source package and environment manager. It lets you install different versions of packages and their dependencies on the same machine and switch between environments.
If you work in deep learning, you are probably familiar with Anaconda. However, NVIDIA Jetson Xavier NX uses an ARM architecture, and Anaconda (and the minimal Miniconda) does not support ARM64.
Today, mainstream CPU architectures include Intel's x86/x64 and ARM's ARM/ARM64. Most laptops/desktops are x86/x64 (except Apple Silicon). Xavier is ARM64, so many things that work on x86/x64 won’t work there.
Keep this in mind: if you see strange errors on Jetson (for example, “No such file or directory”), the first thing to check is whether you downloaded the correct ARM64 build.
On ARM64, a common Anaconda replacement is Miniforge. Compared with Miniconda, the key difference is that Miniforge uses conda-forge as the default channel; otherwise, it is largely the same.
3.2. Install Miniforge
- I downloaded Miniforge-pypy3-4.11.0-0-Linux-aarch64.sh, which is for Linux on the aarch64 architecture. (ARM64 is typically referred to as aarch64; 32-bit vs. 64-bit are often aarch32 / aarch64.)
- Go to the directory containing the .sh file, open a terminal, and install:
sh Miniforge-pypy3-4.10.3-3-Linux-aarch64.sh
After installation, add it to your PATH; otherwise you may see bash: conda: command not found.
- Tip: in Vim, press a to enter insert mode; after editing, press ESC to exit insert mode, then type :wq! to save and exit.
# Edit environment variables
vim ~/.bashrc
# Add to PATH (replace <username> with your username)
export PATH=/home/<username>/miniforge-pypy3/bin:$PATH
# Apply changes
source ~/.bashrc
# Show (base)
source activate
- Switch to a mirror (USTC is shown here):
conda config --prepend channels https://mirrors.ustc.edu.cn/anaconda/pkgs/main/
conda config --prepend channels https://mirrors.ustc.edu.cn/anaconda/pkgs/free/
conda config --set show_channel_urls yes
3.3. Install PyTorch and torchvision
3.4. Create a new virtual environment
- This is PyTorch installed via Miniforge. If you don't want to install it in a virtual environment, you can refer to: PyTorch for Jetson - version 1.10 now available - Jetson & Embedded Systems / Jetson Nano - NVIDIA Developer Forums
conda create -n pytorch python=3.6    # create an environment
conda activate pytorch               # activate it
- Other commands (reference only):
conda deactivate                     # deactivate
conda remove -n pytorch --all

conda info -e                        # list environments
After activation, the environment name changes:

3.5. PyTorch 1.8
Install PyTorch with the following commands. pip3 is pip for Python 3. If you don't have it, use pip.
pip3 install -U future psutil dataclasses typing-extensions pyyaml tqdm seaborn
wget https://nvidia.box.com/shared/static/p57jwntv436lfrd78inwl7iml6p13fzh.whl -O torch-1.8.0-cp36-cp36m-linux_aarch64.whl
pip3 install torch-1.8.0-cp36-cp36m-linux_aarch64.whl
If your network is unstable, you can download the PyTorch wheel first. The NVIDIA official forum thread is: https://forums.developer.nvidia.com/t/pytorch-for-jetson-version-1-9-0-now-available/72048
- Issue
If you see Illegal instruction (core dumped), it may be caused by a conflict between NumPy 1.19.5 and OpenBLAS. Modify either one; choose one of the following:
- Downgrade NumPy:
pip3 install -U "numpy==1.19.4"
- Set OpenBLAS:
vim ~/.bashrc
Add:
export OPENBLAS_CORETYPE=ARMV8
Then apply .bashrc:
source ~/.bashrc
3.6. torchvision v0.9.0
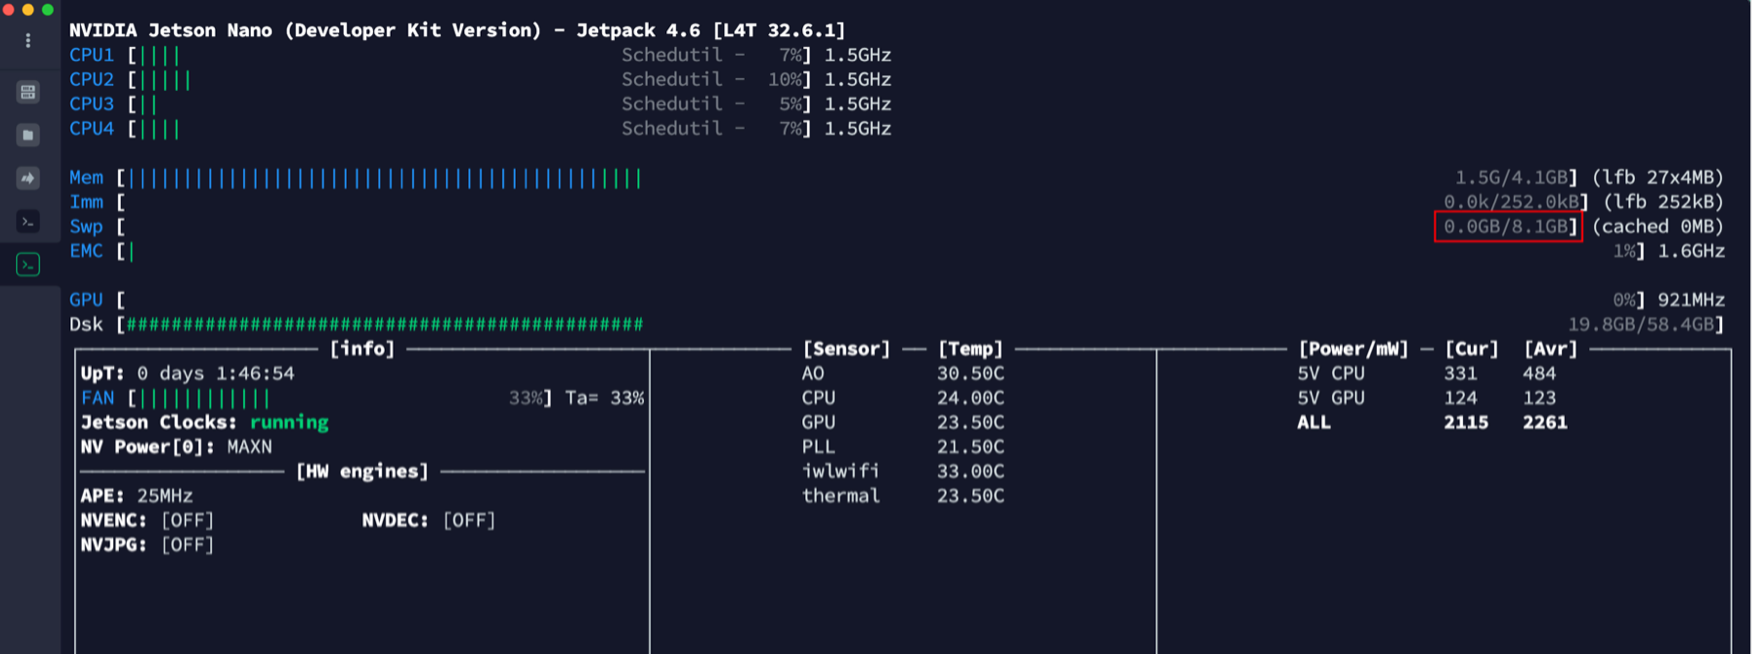
4. View Jetson information (jtop)
sudo pip3 install jetson-stats
sudo jtop
5. Automatic fan control
git clone https://gitee.com/yin-qiyu/jetson-fan-ctl.git
cd /jetson-fan-ctl # enter the folder
sudo apt install python3-dev
sudo ./install.sh
Now your fan can automatically adjust its speed based on temperature.
Fan settings are in /etc/automagic-fan/config.json:
vim /etc/automagic-fan/config.json
Example configuration:
{
  "FAN_OFF_TEMP": 20,
  "FAN_MAX_TEMP": 50,
  "UPDATE_INTERVAL": 2,
  "MAX_PERF": 1
}
6. Increase swap size
- First, check the initial swap size:

- Generate the swapfile as follows:
# 1) Create a swapfile (adjust size as needed) sudo fallocate -l 6G /var/swapfile # 2) Set permissions sudo chmod 600 /var/swapfile # 3) Create the swap area sudo mkswap /var/swapfile # 4) Enable swap sudo swapon /var/swapfile- Enable the swapfile at boot:
sudo bash -c 'echo "/var/swapfile swap swap defaults 0 0" >> /etc/fstab'After success:
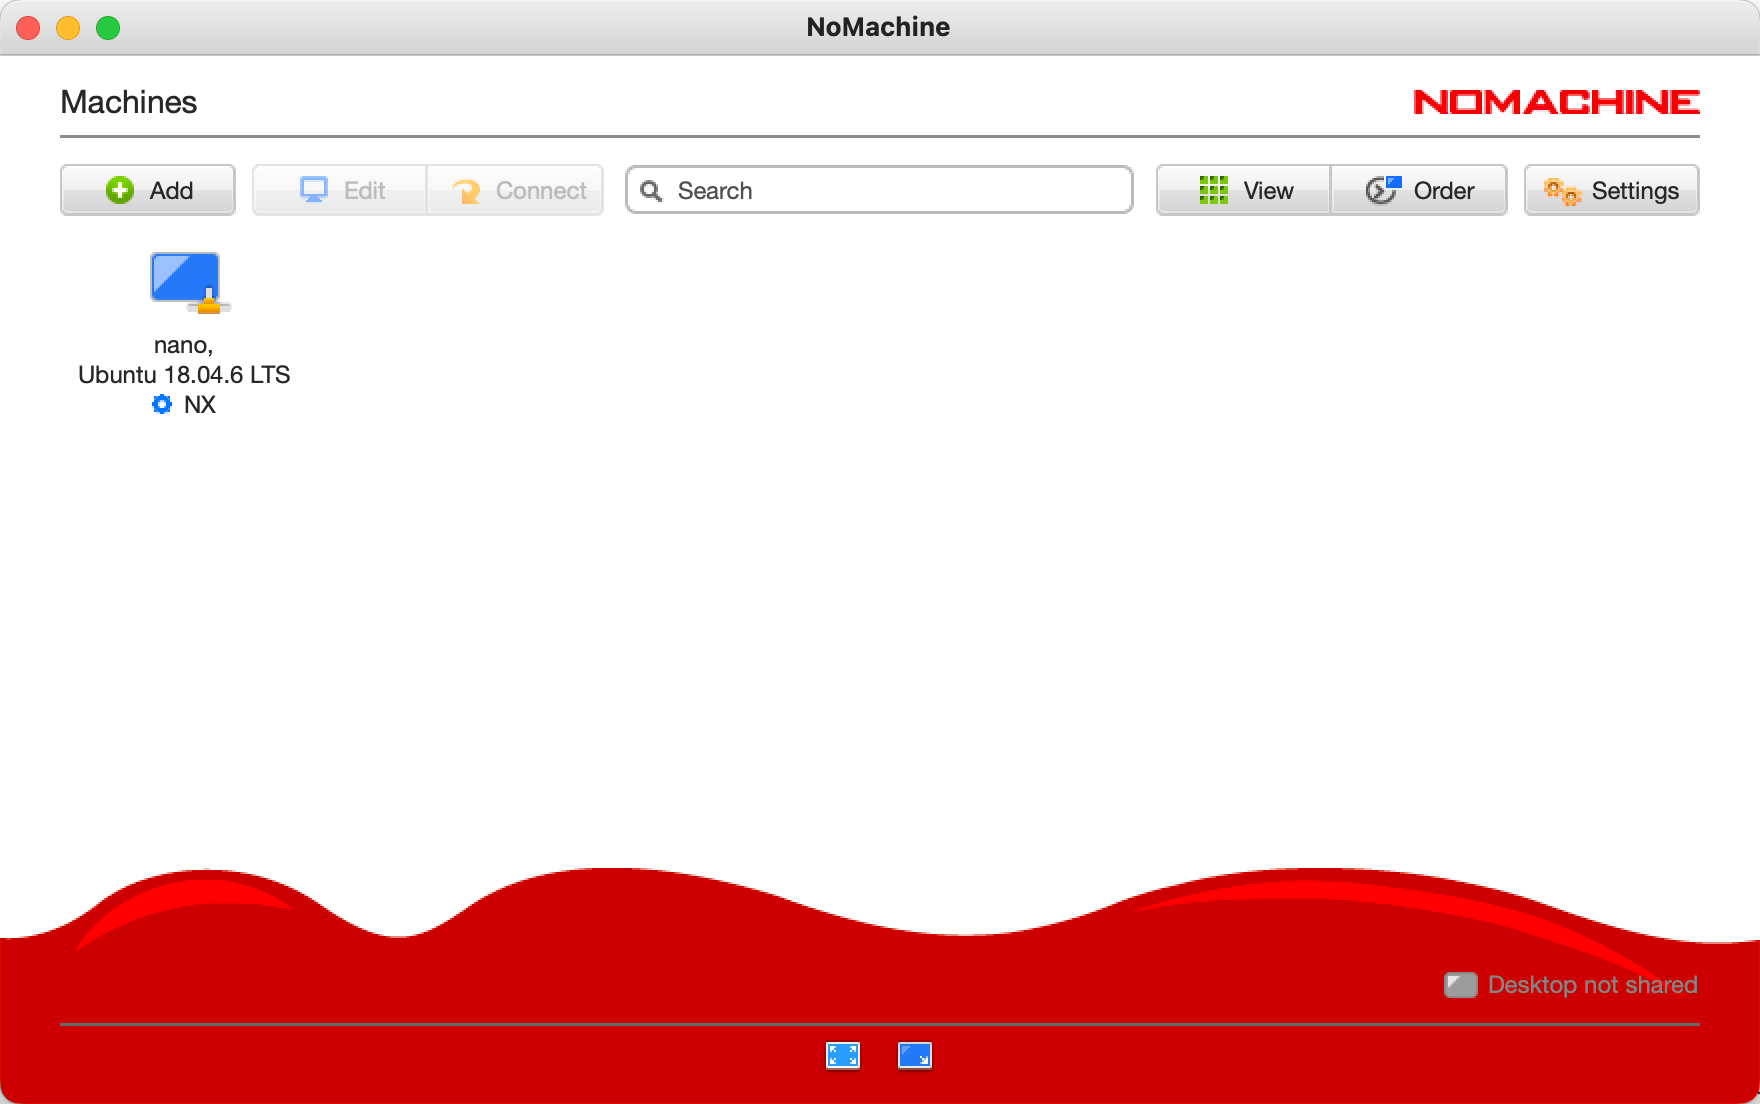
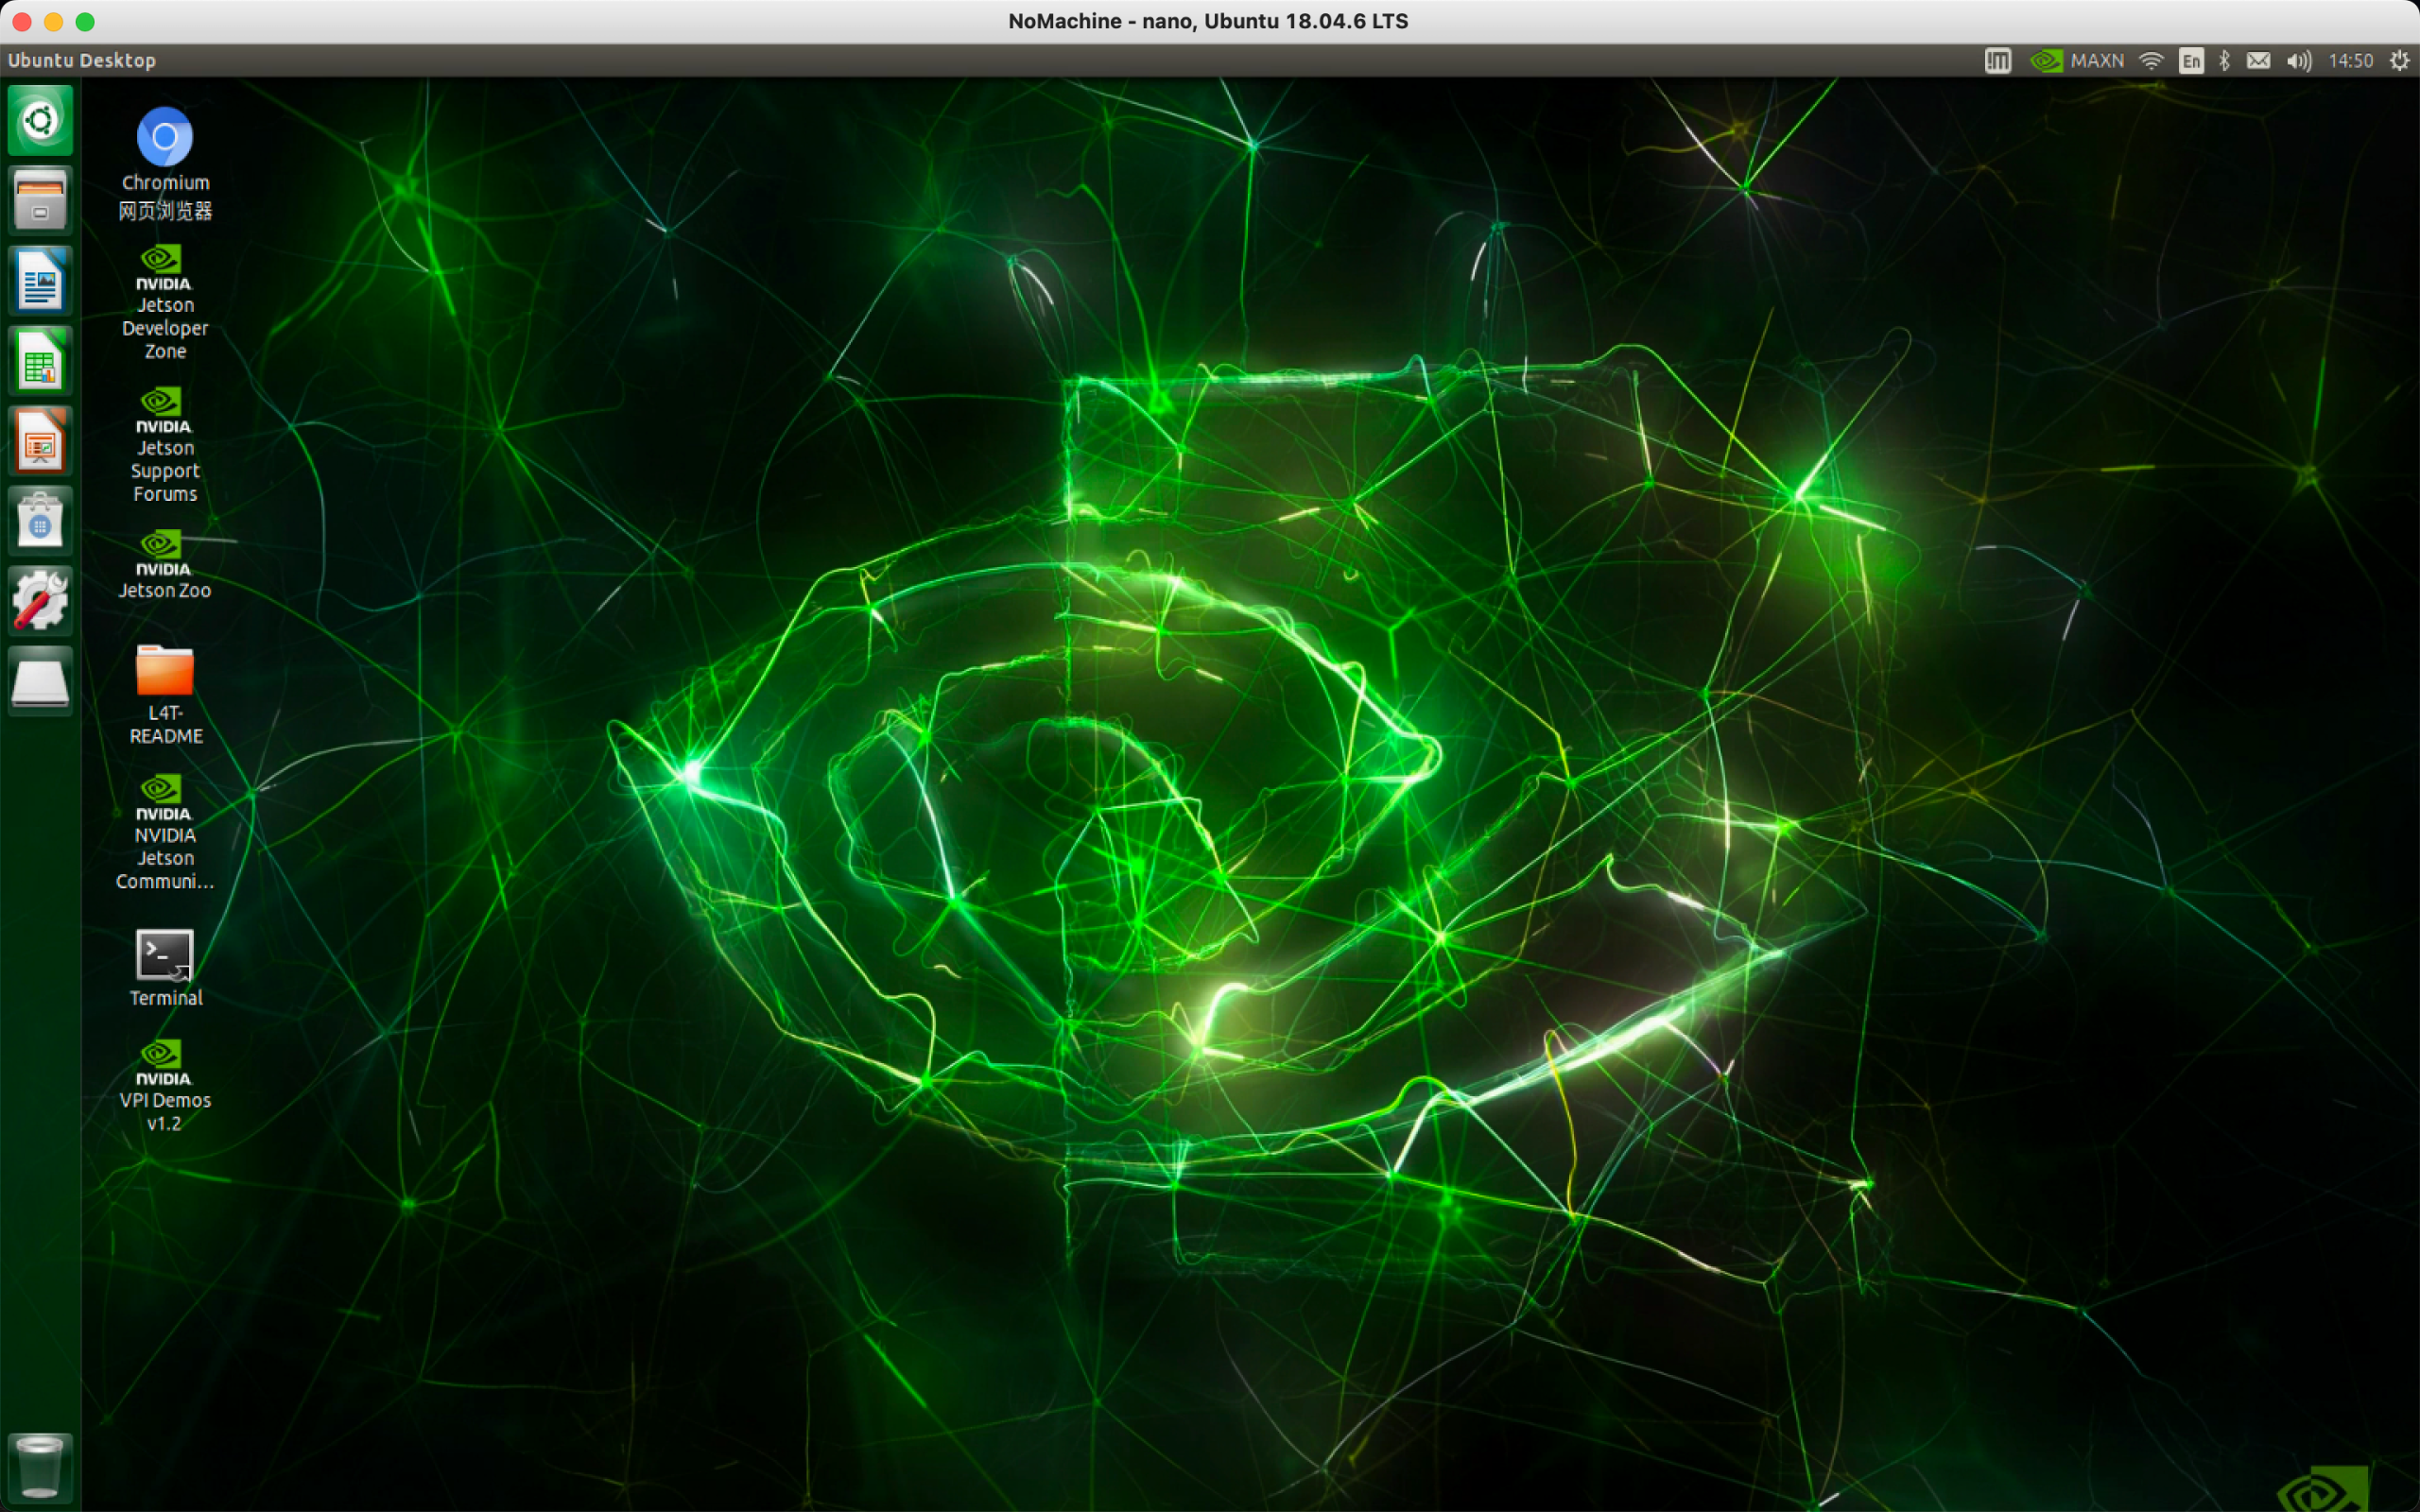
7. NoMachine (remote desktop)
Official website: NoMachine - Free Remote Desktop For Everybody
On the host machine: install normally.
On the Jetson:
Download the matching version and transfer it to the Jetson via SFTP.
Install:
sudo dpkg -i nomachine_7.6.2_3_arm64.deb
If both are on the same LAN, you can connect.
8. VNC (remote desktop)
- Edit the file:
sudo vim /usr/share/glib-2.0/schemas/org.gnome.Vino.gschema.xml
- Scroll to the end and add the following (format as shown in the screenshot):
<key name="enabled" type="b">
  <summary>Enable remote access to the desktop</summary>
  <description>
    If true, allows remote access to the desktop via the RFB
    protocol. Users on remote machines may then connect to the
    desktop using a VNC viewer.
  </description>
  <default>false</default>
</key>
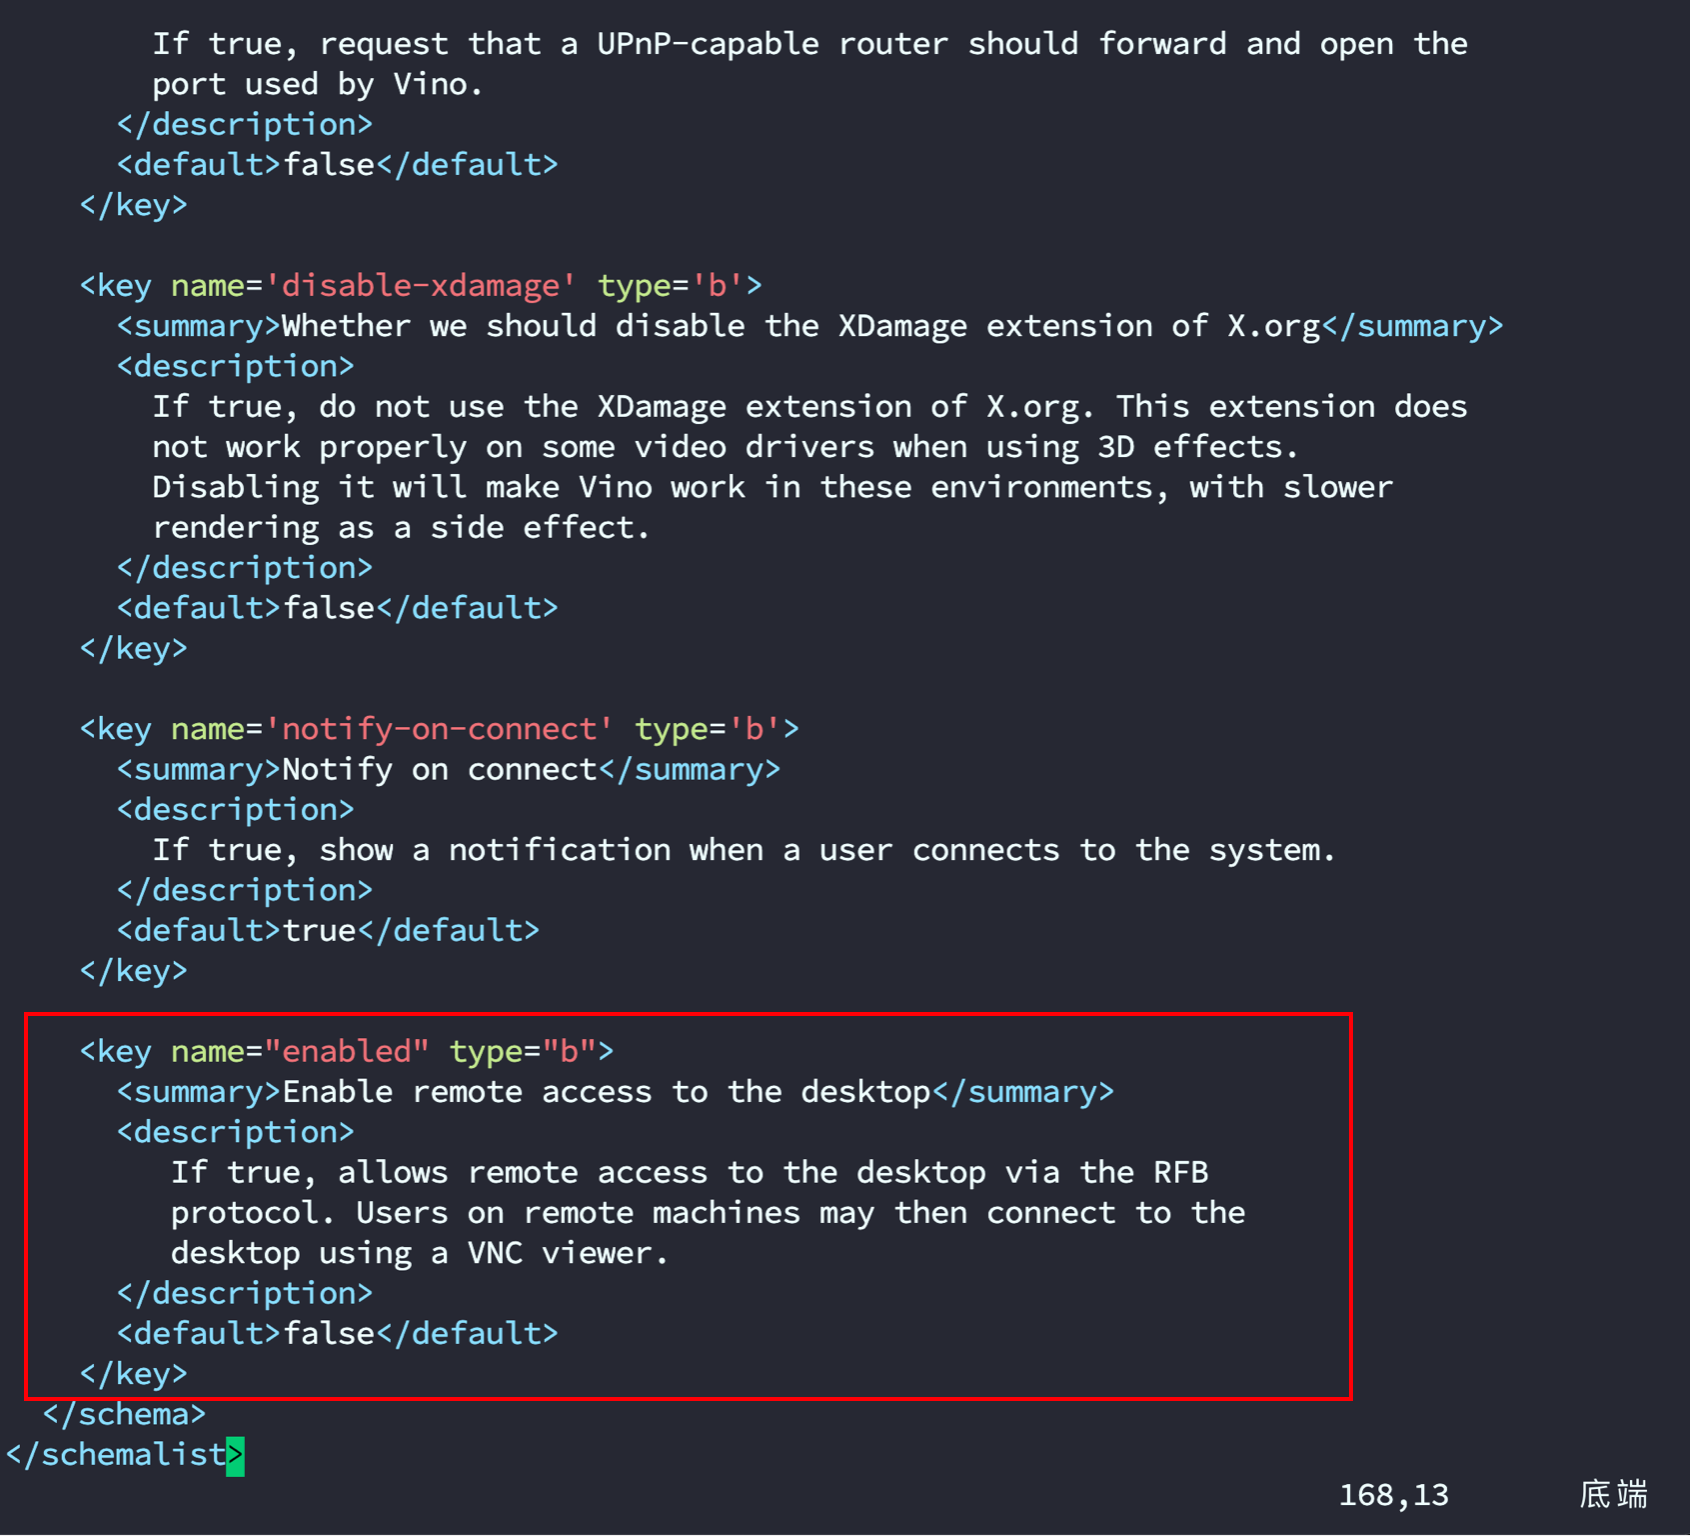
- Compile schemas:
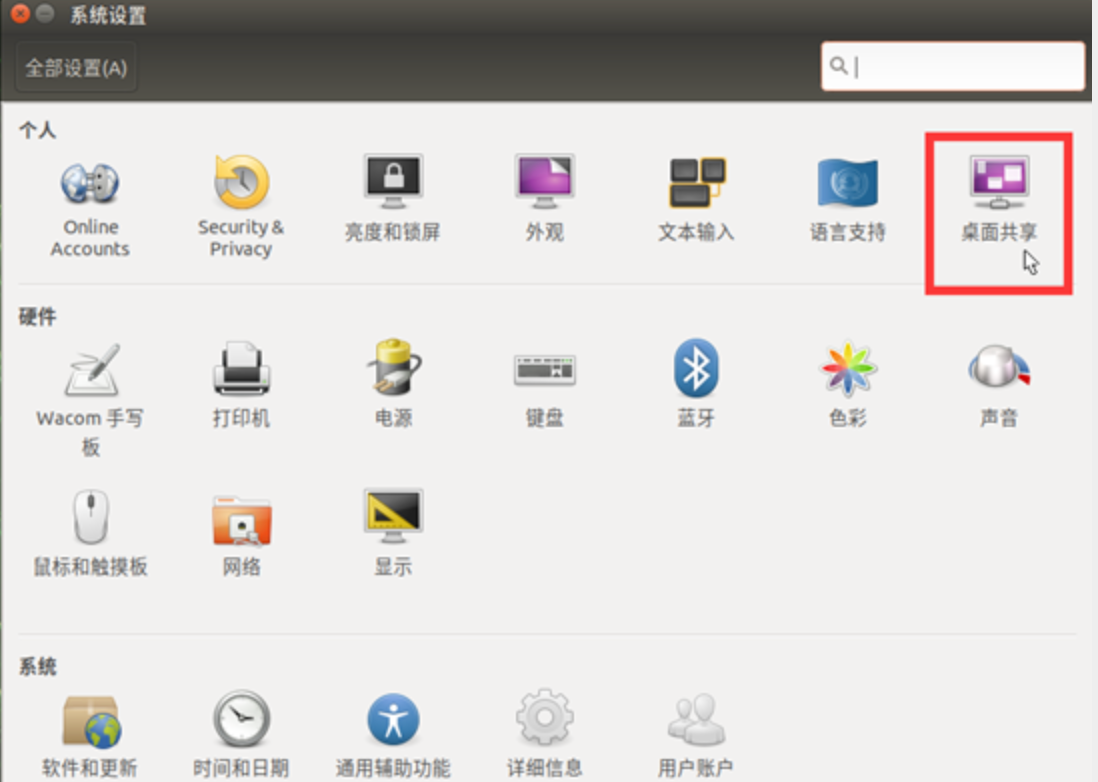
sudo glib-compile-schemas /usr/share/glib-2.0/schemasAfter these steps, you should be able to open the desktop sharing icon.
After setting it up (optional):
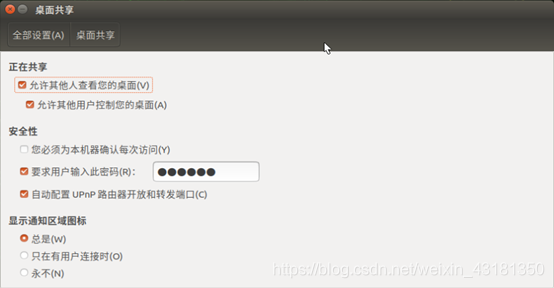
- Configure VNC settings:
gsettings set org.gnome.Vino prompt-enabled false gsettings set org.gnome.Vino require-encryption false- Set a password (optional):
gsettings set org.gnome.Vino authentication-methods "['vnc']" gsettings set org.gnome.Vino vnc-password $(echo -n "YOUR_PASSWORD" | base64)- Configure VNC autostart:
mkdir -p ~/.config/autostart
vi ~/.config/autostart/vino-server.desktop
Add the following content:
[Desktop Entry] Type=Application Name=Vino VNC server Exec=/usr/lib/vino/vino-server NoDisplay=true- Restart required for changes to take effect
sudo reboot
On your PC, you can download: Download VNC Viewer | VNC® Connect (realvnc.com)
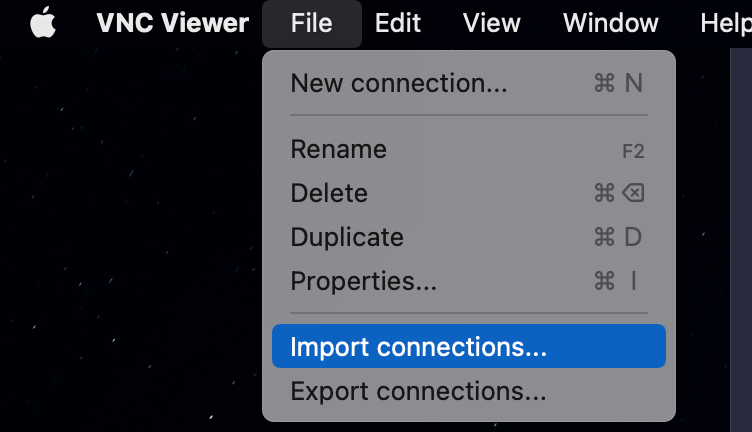
Configure the Jetson Nano's IP and password to connect.
If you see the prompt below, enter your computer account password (the host machine password, not the Jetson password):

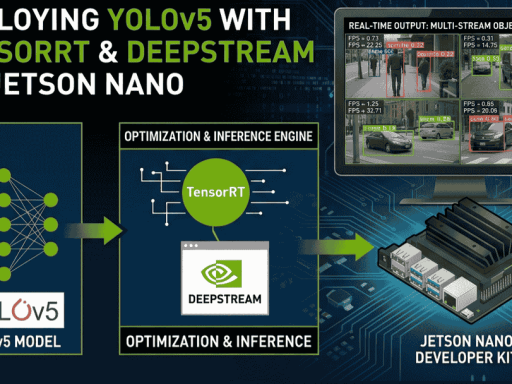
9. TensorRT
9.1. TensorRT overview
Model acceleration is increasingly becoming a “must-have” in deep learning engineering. In recent CVPR and ICLR conferences, model compression and pruning have attracted growing attention.
In production, algorithm engineers need to run deep-learning models on embedded platforms and deploy them into real applications. During inference, compute speed matters a lot.
For example, in autonomous driving, a classic deep-learning model can easily incur ~200 ms latency. That means the car would “see” only 5 frames per second, which is obviously risky. For tasks that require high real-time responsiveness, accelerating models is often necessary.
If you are using NVIDIA products (for example, PX2), then when deploying models on the platform, you may need a dedicated inference acceleration tool—TensorRT.
What does a model under TensorRT do?
TensorRT only handles the inference stage. Generally, you do not train models with TensorRT.
Can TensorRT accelerate models?
Yes. According to the official documentation, TensorRT can provide 10× to 100× acceleration in CPU or GPU mode. In my own experience, TensorRT provided ~20× acceleration.
Why can TensorRT improve runtime speed?
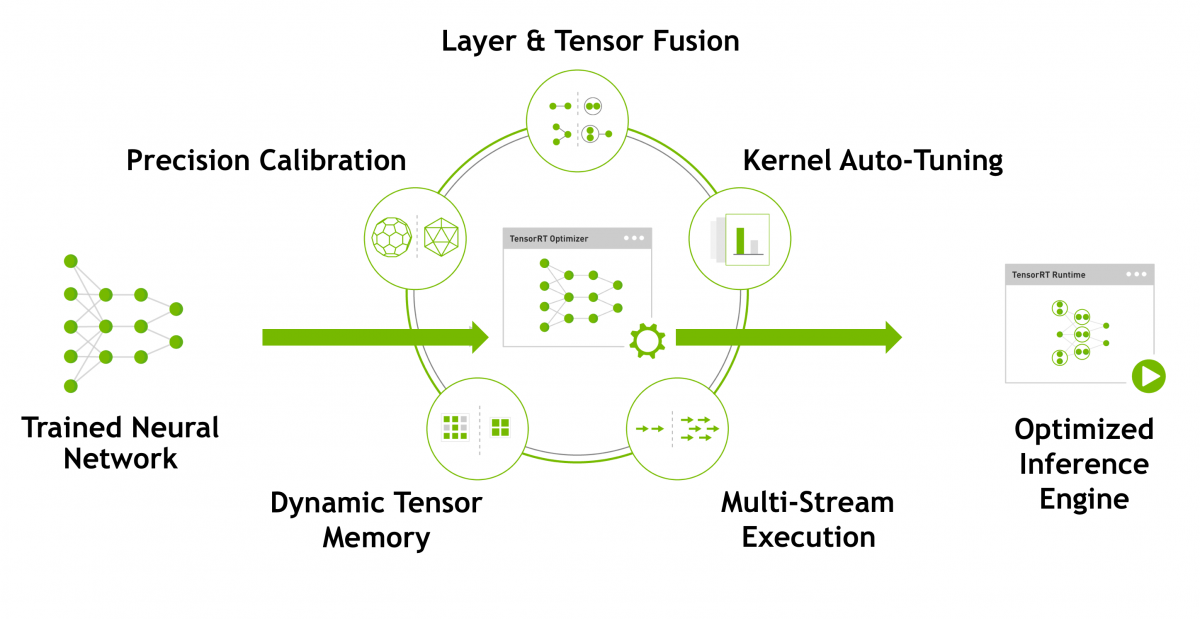
TensorRT is NVIDIA's acceleration toolkit for its own platforms. It mainly improves speed in two ways:
- TensorRT supports INT8 and FP16 computation. During training, deep-learning networks typically use 32-bit or 16-bit data. During inference, TensorRT can use lower precision to speed up inference.
- TensorRT restructures network graphs by fusing operations, and it optimizes based on GPU characteristics. Most deep-learning frameworks are not heavily optimized for GPU performance. NVIDIA (as the GPU vendor) provides TensorRT as an acceleration tool for its GPUs. Without optimization, a model might call cuDNN APIs multiple times for layers such as convolution, bias, and activation/reload, but these can often be fused; TensorRT performs such fusions.
9.2. Check the built-in TensorRT environment (optional)
cd /usr/src/tensorrt/samples
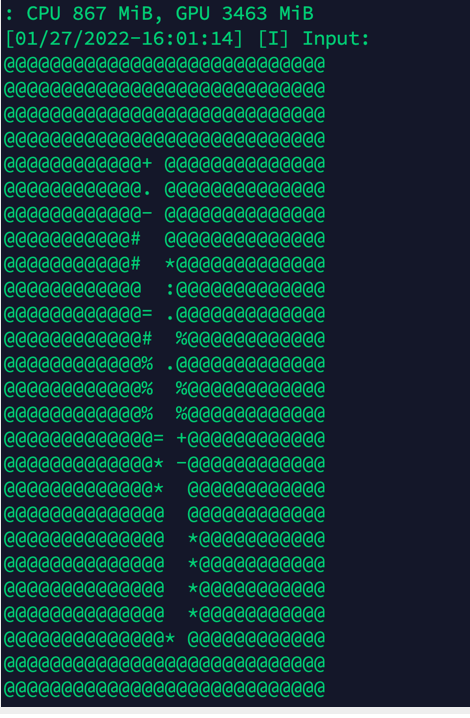
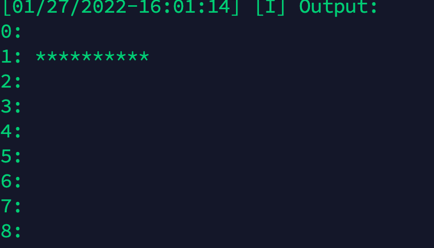
sudo make # compilation takes about 7 minutes
../bin/sample_mnist
9.3. Install the jetson-inference library (optional)
sudo apt update
sudo apt autoremove
sudo apt upgrade
sudo apt install cmake
mkdir ~/workspace
cd workspace
git clone https://gitee.com/weikun-xuan/jetson-inference.git
cd jetson-inference
git submodule update --init
start
- Get the source code
Open a terminal and run:
sudo apt-get update
sudo apt-get install git cmake libpython3-dev python3-numpy
git clone --recursive https://gitee.com/weikun-xuan/jetson-inference.git
I switched all repository sources myself; downloading from Gitee is often faster than GitHub in some regions.
- Switch mirrors
Go into the tools directory:
cd jetson-inference/tools
Switch mirrors by running the following commands (all under tools):
(1) Use a domestic mirror for model downloads:
sed -in-place -e 's@https://nvidia.box.com/shared/static@https://bbs.gpuworld.cn/mirror@g' download-models.sh
(2) Use domestic mirrors for PyTorch:
sed -in-place -e 's@https://nvidia.box.com/shared/static@https://bbs.gpuworld.cn/mirror@g' install-pytorch.sh
sed -in-place -e 's@https://github.com/pytorch/vision@https://gitee.com/vcan123/pytorch@g' install-pytorch.sh
sed -in-place -e 's@https://github.com/dusty-nv/vision@https://gitee.com/vcan123/dusty-nv@g' install-pytorch.sh
- Build and install
In the jetson-inference directory, do:
mkdir build
cd build
cmake ../
Then you will see:
Model package installation
This step installs model packages. I recommend deselecting all—otherwise it may take a while. You can later download them manually from the releases page.
Continue:
PyTorch installation
Install PyTorch. At this point there should only be one option for Python 3.6—select it and click OK.
After that, still under build, run:
make
sudo make install
sudo ldconfig
Done.
10. Install Jupyter and JetCam
- Install Node.js and npm
pip3 install --upgrade pip  # upgrade pip
sudo apt install nodejs npm
The versions installed by the command above may be too old, and you may see errors later when installing JupyterLab extensions. Check the versions; Node should be at least 12.3.0.
node -v
npm -v
Install the n module, which can update Node or install a specific Node version:
sudo npm install -g n
For reference only (no action needed), common n commands include:
- Clear npm cache: npm cache clean -f
- Install n: npm install -g n
- Install the stable release: n stable
- Install the latest release: n latest
- Install a specific version: n 11.6.0
- List installed versions: n
- Check current version: node -v
- Remove a specific version: n rm 7.5.0
After understanding n, install the desired Node version (or the latest), for example:
sudo n latest
After installation, run node -v to confirm. If the version doesn’t change, try rebooting. If it still doesn’t change, run:
sudo n
It will show an interactive menu of installed Node versions (e.g., v15.0.1). Use the arrow keys to select a version and press Enter to apply it. If it still doesn’t change, reboot again.
- Install JupyterLab (ignore warnings; if it fails, try running again)
sudo pip3 install jupyter jupyterlab
sudo jupyter labextension install @jupyter-widgets/jupyterlab-manager
sudo jupyter labextension install @jupyterlab/statusbar
Generate configuration files (if you hit a permissions error for a file, try sudo chmod 777 to grant permissions):
jupyter lab --generate-config
Set a password for entering the notebook (you will enter it twice; the second time is confirmation):
jupyter notebook password
When you log in to the notebook for the first time, you must enter the password you set here. Please remember it.
Set up JupyterLab to start at boot. There is a create_jupyter_service.py script:
Run create_jupyter_service.py to generate nano_jupyter.service:
python3 create_jupyter_service.py
Move the generated service file into system services:
sudo mv nano_jupyter.service /etc/systemd/system/nano_jupyter.service
Enable the service:
sudo systemctl enable nano_jupyter.service
Start the service manually:
sudo systemctl start nano_jupyter.service
- Install JetCam
JetCam is an easy-to-use Python camera interface for NVIDIA Jetson. It works with various USB and CSI cameras together with Jetson’s Accelerated GStreamer plugin. It can easily read images as NumPy arrays (for example: image = camera.read()). If you set running = True, it attaches callbacks to new frames. JetCam makes prototyping AI projects in Python easier, especially in the JupyterLab environment installed in JetCard.
Install:
git clone https://github.com/NVIDIA-AI-IOT/jetcam
cd jetcam
sudo python3 setup.py install
For detailed usage and APIs, see: https://github.com/NVIDIA-AI-IOT/jetcam
11. Darknet framework (optional)
git clone https://github.com/AlexeyAB/darknet.git # download the Darknet framework
cd darknet
sudo vim Makefile  # edit Makefile
- Modify the first three lines of Makefile:
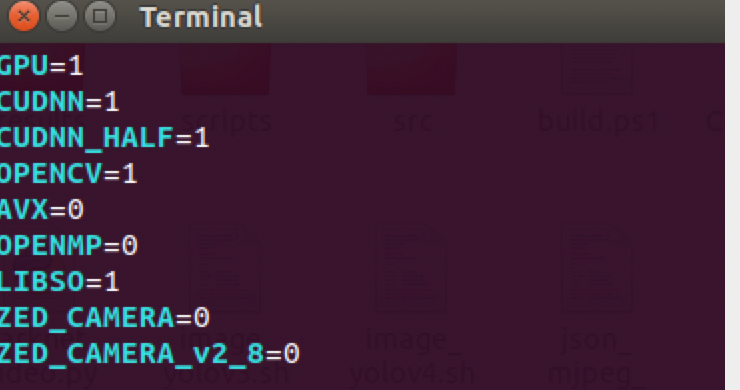
Also check the nvcc path shown in the screenshot (if you already configured the environment variables above, you can skip this):

- After editing, press ESC, then type :wq to save and exit.
- Compile under the darknet directory:
make -j4After compilation:
Run ./darknet:

Download YOLOv4 and YOLOv4-tiny weight files from the YOLO website and place them into the folder.
# YOLOv4 image detection
./darknet detect cfg/yolov4.cfg yolov4.weights data/dog.jpg  # short form
./darknet detector test cfg/coco.data cfg/yolov4.cfg yolov4.weights data/dog.jpg  # full form

# YOLOv4-tiny image detection
./darknet detect cfg/yolov4-tiny.cfg yolov4-tiny.weights data/dog.jpg  # short form
./darknet detector test cfg/coco.data cfg/yolov4-tiny.cfg yolov4-tiny.weights data/dog.jpg  # full form

# Change the detection threshold
# By default, YOLO only shows objects with confidence >= 0.25.
# You can change this by passing the -thresh flag.

# Example: show all detections by setting threshold to 0.1
./darknet detect cfg/yolov4-tiny.cfg yolov4-tiny.weights data/dog.jpg -thresh 0.1
# YOLOv4 real-time camera detection:
./darknet detector demo cfg/coco.data cfg/yolov4.cfg yolov4.weights /dev/video1

# YOLOv4-tiny real-time camera detection:
./darknet detector demo cfg/coco.data cfg/yolov4-tiny.cfg yolov4-tiny.weights /dev/video1
# YOLOv4 video detection (the video file is not included in the github repo's data folder;
# you need to upload your own video to the data folder)
./darknet detector demo cfg/coco.data cfg/yolov4.cfg yolov4.weights data/123.mp4

# YOLOv4-tiny video detection (same note as above)
./darknet detector demo cfg/coco.data cfg/yolov4-tiny.cfg yolov4-tiny.weights data/xxx.mp4
- To use a CSI camera, you need GStreamer support:
./darknet detector demo cfg/coco.data cfg/yolov4-tiny.cfg yolov4-tiny.weights "nvarguscamerasrc ! video/x-raw(memory:NVMM), width=1280, height=720, format=NV12, framerate=30/1 ! nvvidconv ! video/x-raw, width=1280, height=720, format=BGRx ! videoconvert ! video/x-raw, format=BGR ! appsink"
Fixing a green screen when using a CSI camera on Jetson Nano with Darknet real-time detection
Install GStreamer on Nvidia Jetson Nano
sudo add-apt-repository universe
sudo add-apt-repository multiverse
sudo apt-get update
sudo apt-get install gstreamer1.0-tools gstreamer1.0-alsa gstreamer1.0-plugins-base gstreamer1.0-plugins-good gstreamer1.0-plugins-bad gstreamer1.0-plugins-ugly gstreamer1.0-libav
sudo apt-get install libgstreamer1.0-dev libgstreamer-plugins-base1.0-dev libgstreamer-plugins-good1.0-dev libgstreamer-plugins-bad1.0-dev
1. Configure the GStreamer pipeline
The idea is: since YOLOv3 itself does not support CSI cameras, you need to use GStreamer to preprocess the video frames captured by the CSI camera and then feed them into YOLOv3 for detection. The key is how you configure the GStreamer pipeline. Below is the pipeline configuration used by the author:
# Only for running the YOLOv4-tiny demo on Jetson Nano.
# Note: run this in a terminal opened under the Darknet directory.

./darknet detector demo cfg/coco.data cfg/yolov4-tiny.cfg yolov4-tiny.weights "nvarguscamerasrc ! video/x-raw(memory:NVMM), width=1280, height=720, format=NV12, framerate=30/1 ! nvvidconv flip-method=2 ! video/x-raw, width=1280, height=720, format=BGRx ! videoconvert ! video/x-raw, format=BGR ! appsink"

./darknet detector demo cfg/coco.data cfg/yolov4-tiny.cfg yolov4-tiny.weights "nvarguscamerasrc ! video/x-raw(memory:NVMM), width=1280, height=720, format=NV12, framerate=30/1 ! nvvidconv flip-method=2 ! video/x-raw, width=1280, height=720, format=BGRx ! videoconvert ! video/x-raw, format=BGR ! appsink"
Original version:
./darknet detector demo ok/new.data ok/yolov4-tiny-new.cfg ok/yolov4-tiny-new_last.weights "nvarguscamerasrc ! video/x-raw(memory:NVMM), width=1280, height=720, format=NV12, framerate=30/1 ! nvvidconv flip-method=2 ! video/x-raw, width=1280, height=720, format=BGRx ! videoconvert ! video/x-raw, format=BGR ! appsink"
Mask (face mask detection):
./darknet detector demo cfg/obj.data cfg/yolov4-tiny-masks.cfg yolov4-tiny-obj_last.weights "nvarguscamerasrc ! video/x-raw(memory:NVMM), width=1280, height=720, format=NV12, framerate=30/1 ! nvvidconv flip-method=2 ! video/x-raw, width=1280, height=720, format=BGRx ! videoconvert ! video/x-raw, format=BGR ! appsink"
YOLO:
./darknet detector demo cfg/coco.data cfg/yolov4-tiny.cfg yolov4-tiny.weights "nvarguscamerasrc ! video/x-raw(memory:NVMM), width=1280, height=720, format=NV12, framerate=30/1 ! nvvidconv flip-method=2 ! video/x-raw, width=1280, height=720, format=BGRx ! videoconvert ! video/x-raw, format=BGR ! appsink"
sudo add-apt-repository universe
sudo add-apt-repository multiverse
sudo apt-get update
sudo apt-get install gstreamer1.0-tools gstreamer1.0-alsa gstreamer1.0-plugins-base gstreamer1.0-plugins-good gstreamer1.0-plugins-bad gstreamer1.0-plugins-ugly gstreamer1.0-libav
sudo apt-get install libgstreamer1.0-dev libgstreamer-plugins-base1.0-dev libgstreamer-plugins-good1.0-dev libgstreamer-plugins-bad1.0-dev
# Official:
./darknet detector demo ok/new.data ok/yolov4-tiny-new.cfg ok/yolov4-tiny-new_last.weights "nvarguscamerasrc ! video/x-raw(memory:NVMM), width=1280, height=720, format=NV12, framerate=30/1 ! nvvidconv flip-method=2 ! video/x-raw, width=1280, height=720, format=BGRx ! videoconvert ! video/x-raw, format=BGR ! appsink"

# Only for running the YOLOv3-tiny demo on Jetson Nano.
# Note: run this in a terminal opened under the Darknet directory.
./darknet detector demo cfg/coco.data cfg/yolov4-tiny.cfg yolov4-tiny.weights "nvarguscamerasrc ! video/x-raw(memory:NVMM), width=1280, height=720, format=NV12, framerate=30/1 ! nvvidconv flip-method=2 ! video/x-raw, width=1280, height=720, format=BGRx ! videoconvert ! video/x-raw, format=BGR ! appsink"

./darknet detector demo cfg/coco.data cfg/yolov4-tiny.cfg yolov4-tiny.weights "nvarguscamerasrc ! video/x-raw(memory:NVMM), width=1280, height=720, format=NV12, framerate=30/1 ! nvvidconv flip-method=2 ! video/x-raw, width=1280, height=720, format=BGRx ! videoconvert ! video/x-raw, format=BGR ! appsink"

./darknet detector demo cfg/coco.data cfg/yolov4-tiny.cfg yolov4-tiny.weights "nvarguscamerasrc ! video/x-raw(memory:NVMM), width=1280, height=720, format=NV12, framerate=30/1 ! nvvidconv flip-method=2 ! video/x-raw, width=1280, height=720, format=BGRx ! videoconvert ! video/x-raw, format=BGR ! appsink"